It’s well known that the electronics market is full of fake components. Some fakes are better than others but in general, fakes are the source of many unexpected problems.
100% of power transistors available on eBay and Aliexpress are fakes – period. It’s also easy to know if they are fake or not: They will usually blow up when used well below their maximum ratings. But other components fail in unexpected ways.
But when it comes to other components, it’s hard to tell. They may seem to work, but also they may do strange things. So today I’m going to compare four specimens.
- BC546C, from a good source
- BC547C, 2N3904, and PN2222A; from auction sites
Physical Appearance
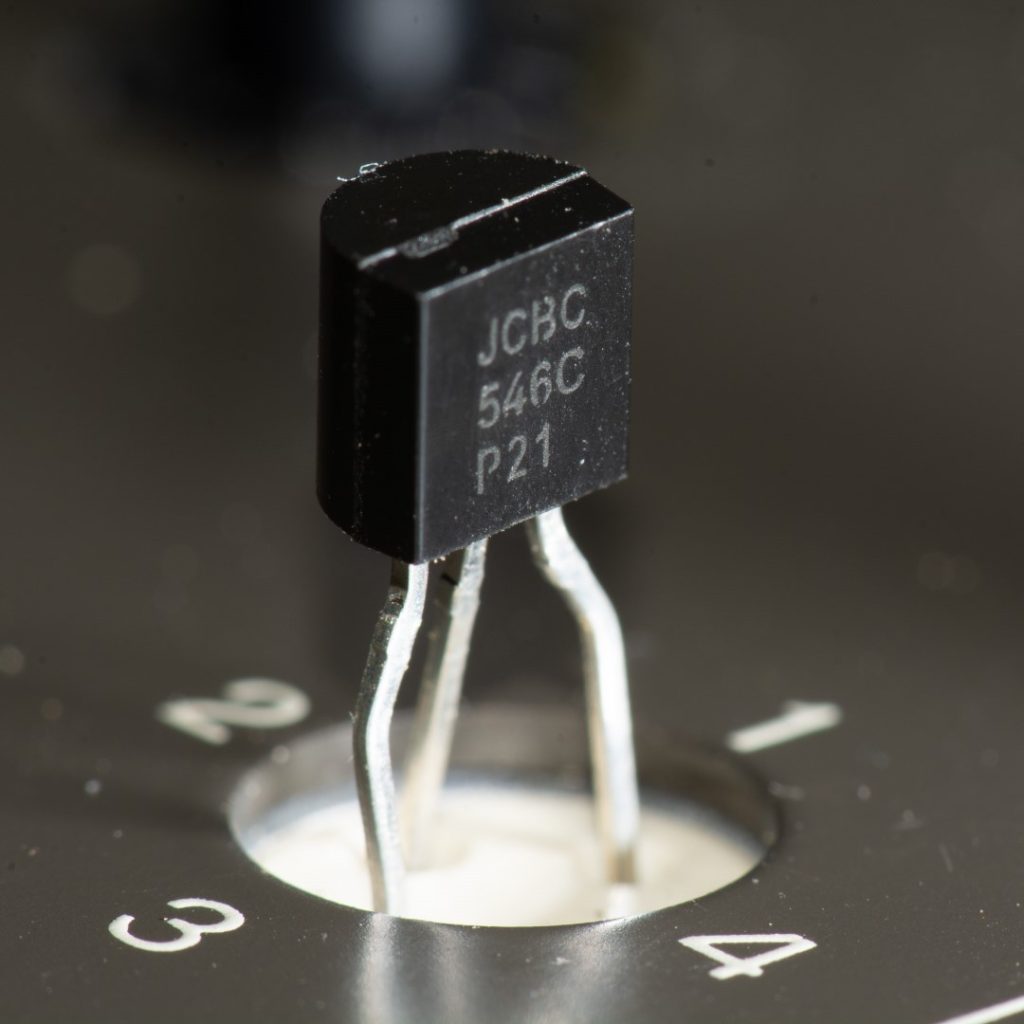
Our first specimen is a BC546C. This one was from a reputable seller (Mouser) and the manufacturer is onsemi. Being a C suffix, it should have an hFE value of at least 420 up to 800, according to the datasheet.
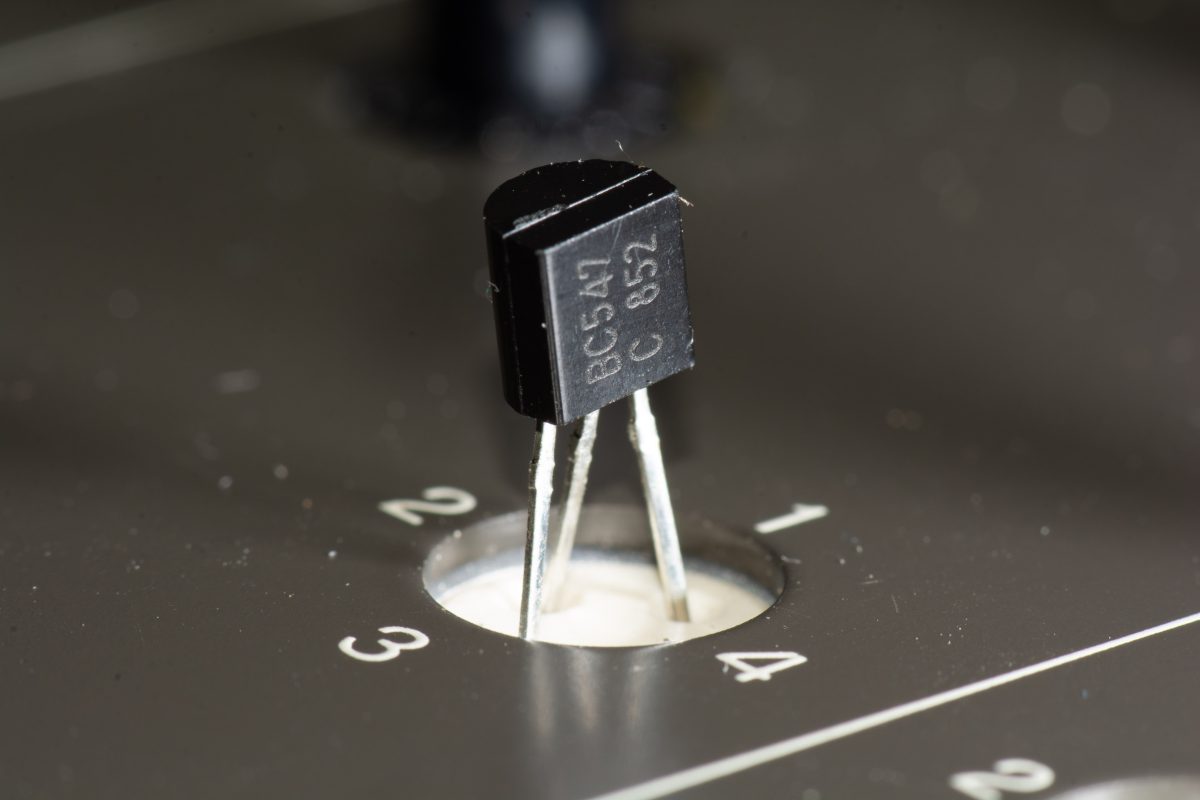
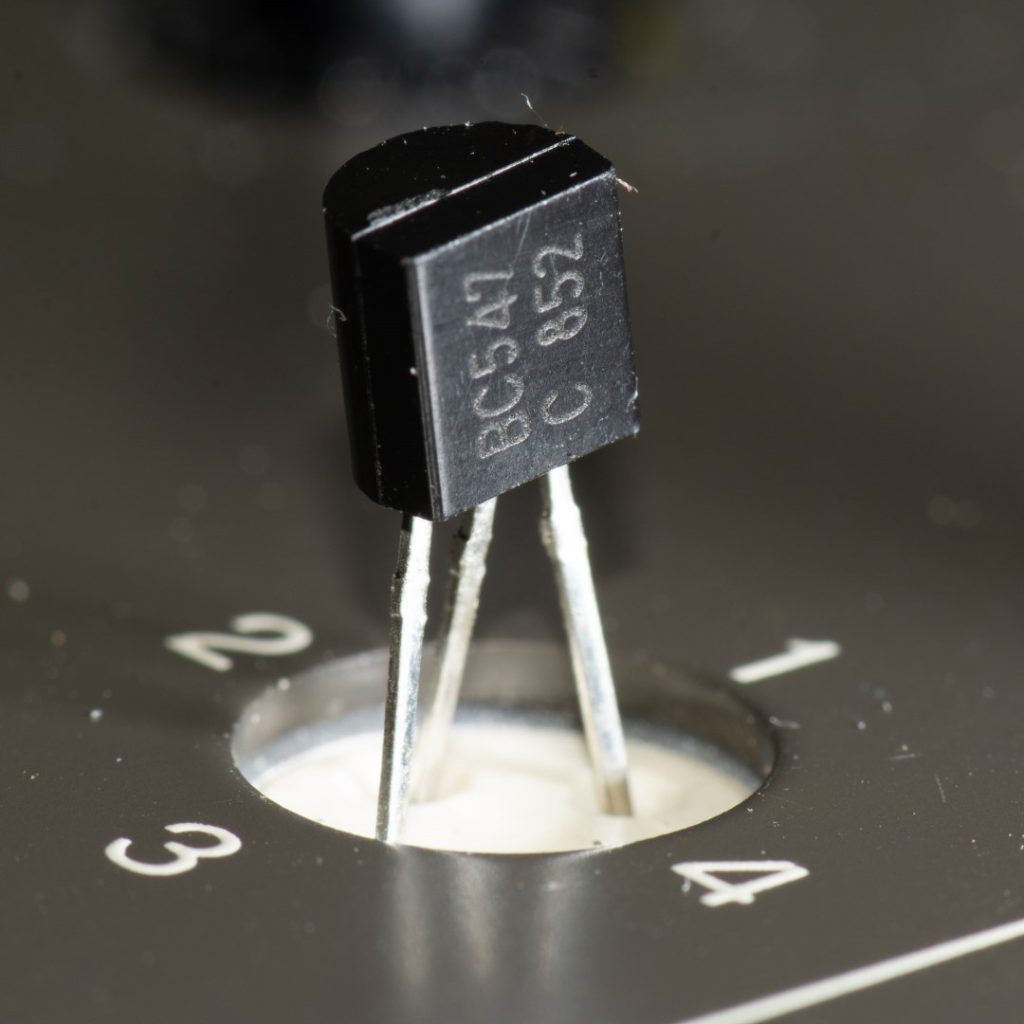
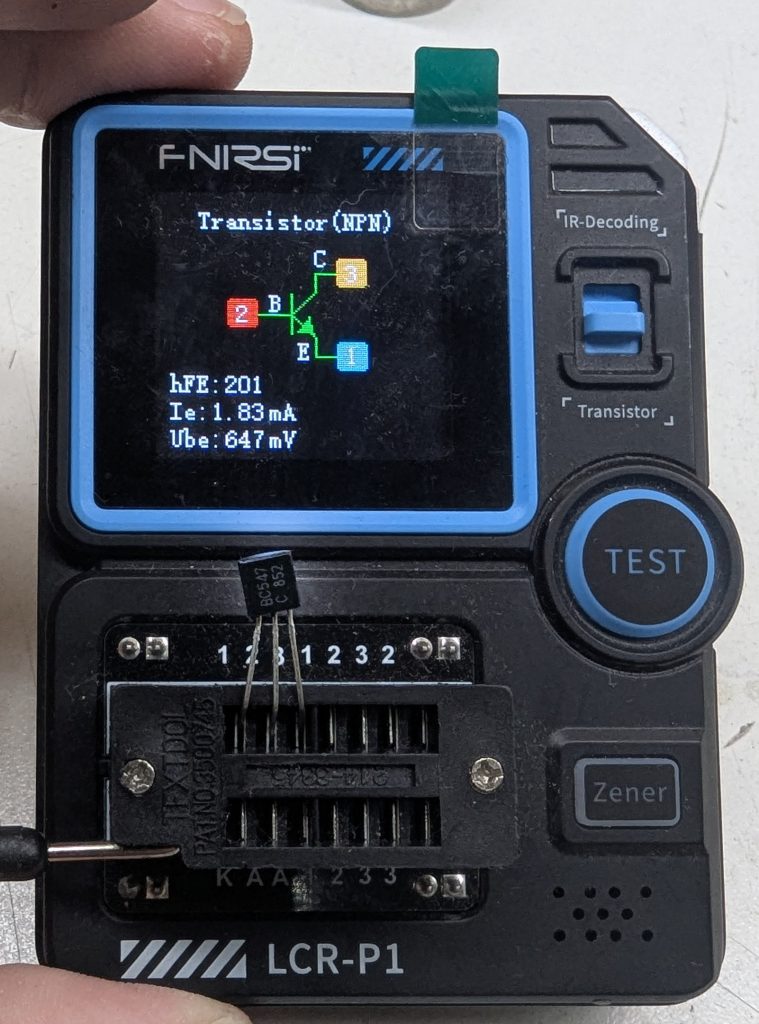
Second, we have a BC547, presumably a C grade also, if the C means that it’s a C grade. It’s not really possible to tell, since we don’t know the manufacturer and have no datasheet. Being a C grade though, its hFE should be over 400
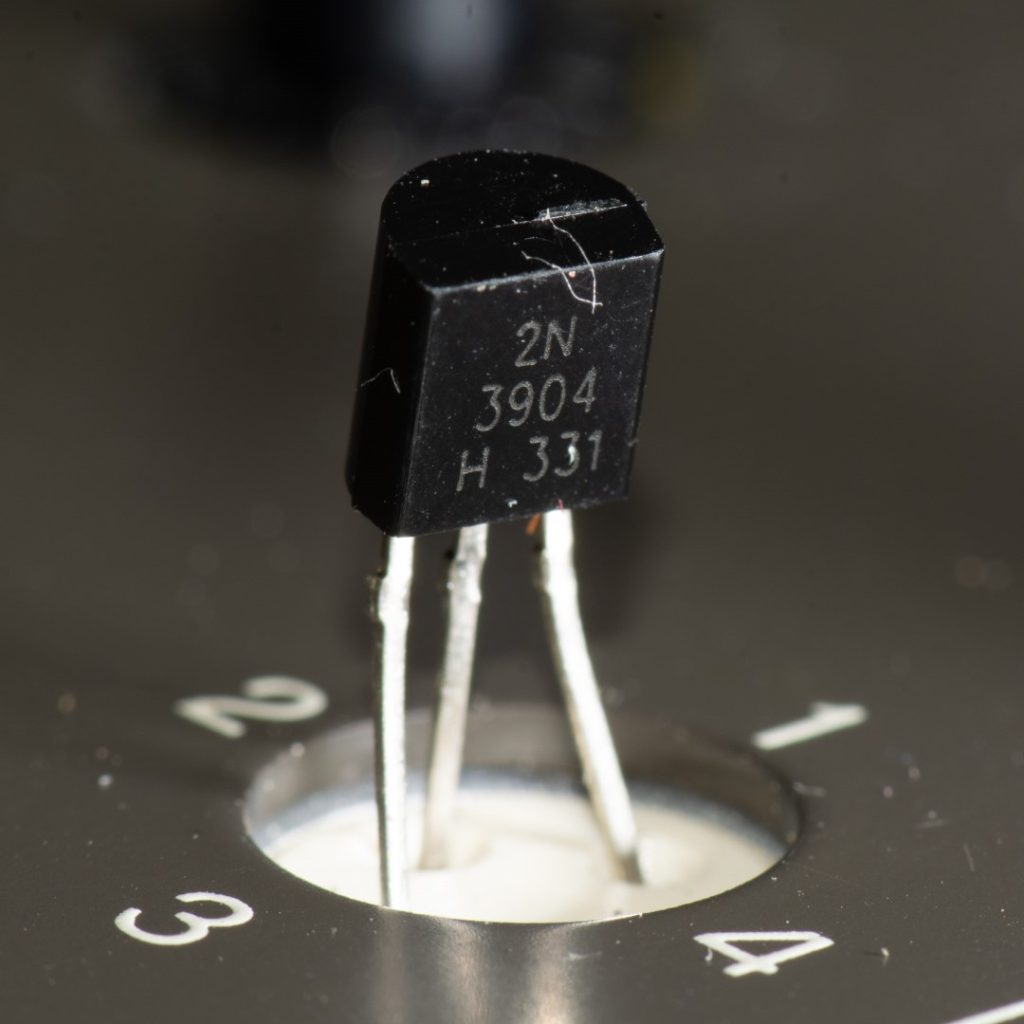
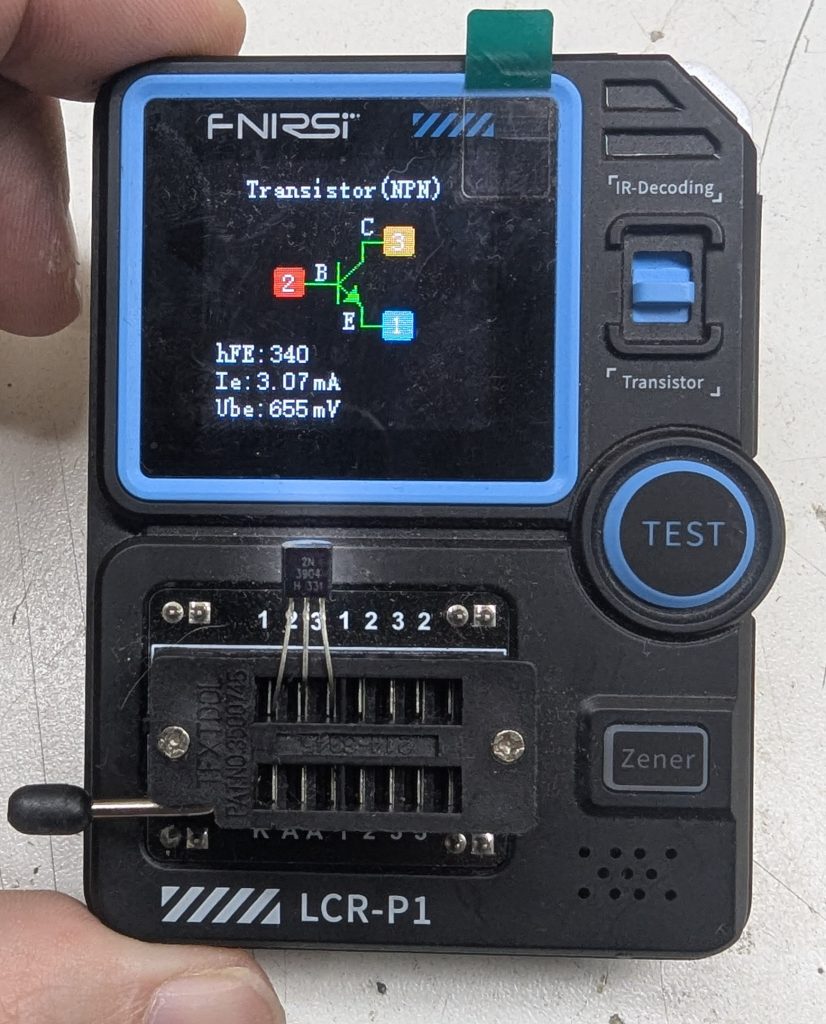
Now it’s the 2N3904’s turn. Also an unknown manufacturers. These transistors don’t have letter suffixes. If we assume this is an onsemi part, the datasheet specifies an hFE of 100 to 400.
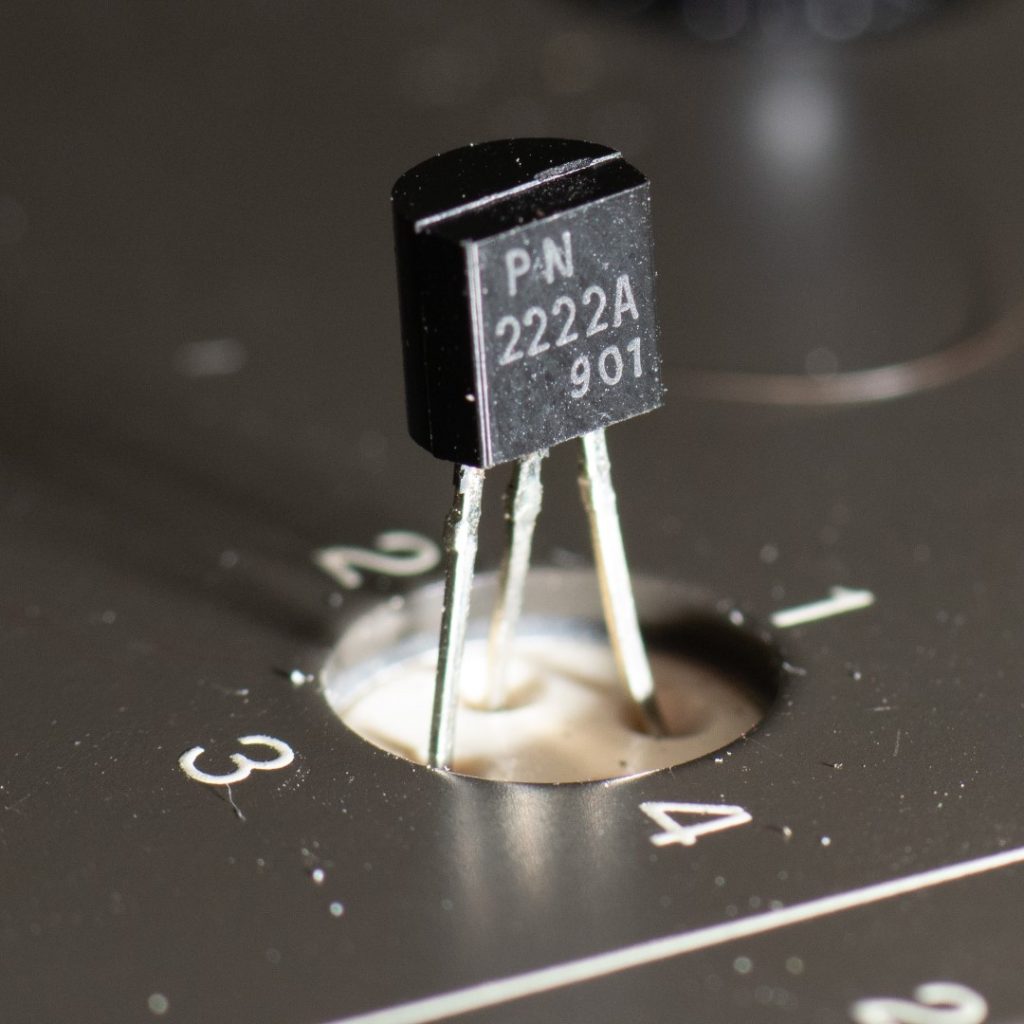
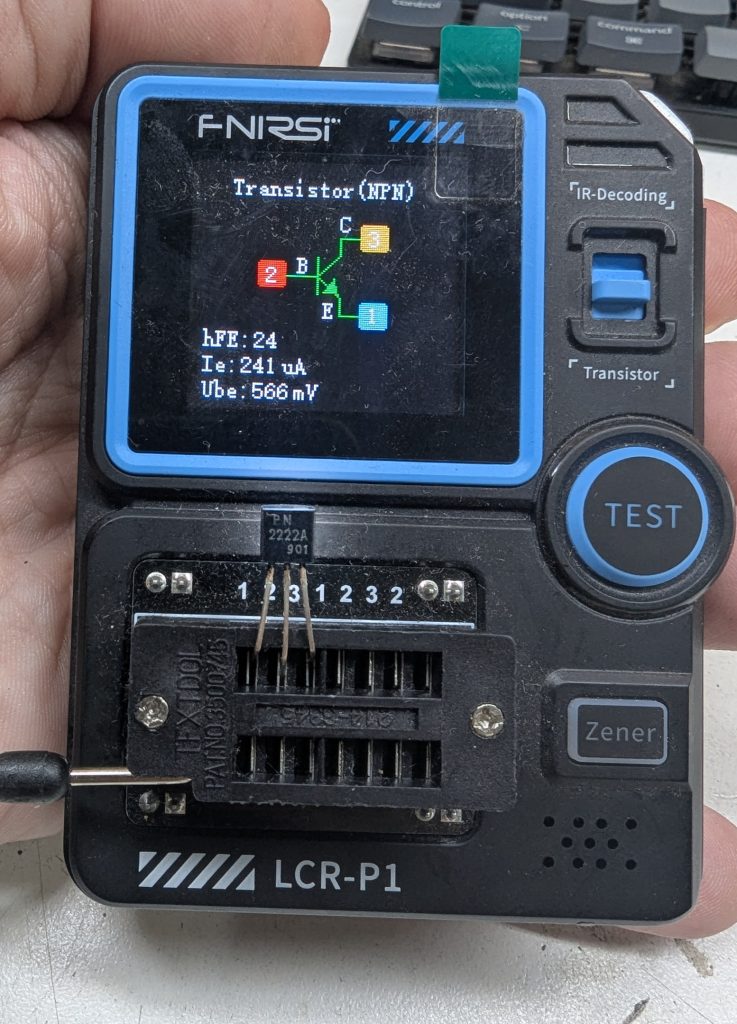
And finally we have a PN2222A. According to the datasheet, it should have an hFE of 50 to 200. Usually with these, a dead giveaway that they’re fake is that they’re marked 2N2222 which is not the right part number (those are metal cans). But this one seems correct…
First tests
For our first tests we’ll use a cheap component tester. This one is a cheap one I got for free when purchasing a soldering iron. Let’s see the results.

Results
| Transistor | Expected hFE (β) | Measured hFE (β) | Pass |
| BC546C | 420-800 | 433 | ✅ |
| BC547C | 420-800 | 201 | ❌ |
| PN2222A | 50-200 | 24 | ❌ |
| 2N3904 | 100-400 | 340 | ✅ |
Results are mixed. The reputable-source 546C is within spec. A bit on the low side, but OK. The 547 and the 2222 are 50% under… or are they? more on this later.
A red flag
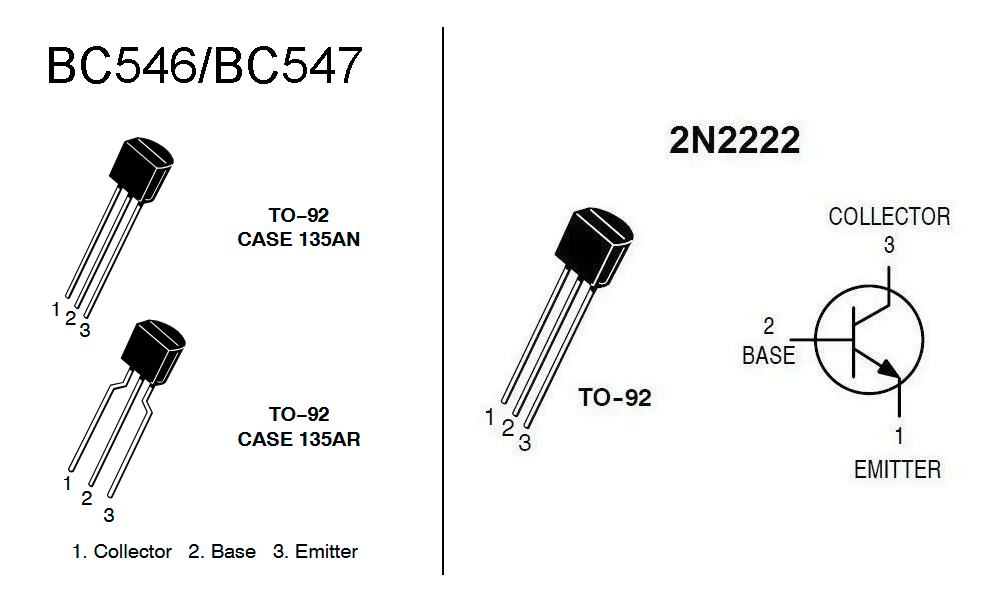
Something that might go unnoticed is that the BC547C, according to the cheap tester, has the same pinout as the PN2222A and 3904. The 546C, on the other hand, shows the right pinout. If there were any doubts that the 547 was a fake, it’s now fully confirmed.
Curves
Let’s use something a little more advanced. This is an HP4145B. Made by Yokogawa Hewlett Packard in Japan in the early 80s, this device is called a Semiconductor parameter analyzer. It’s a very advanced curve tracer capable of delivering up to 100V @100mA per channel (of which it has four).

The curve tracer, even though more than 30 years old, is connected to my modern computer via GPIB, and the traces are captured using Michael Katzmann’s awesome HPGLplotter, which emulates an actual plotter.
Let’s get testing
Let’s confirm the pinout of the BC547. This is a trace of the BC547C at the expected orientation:
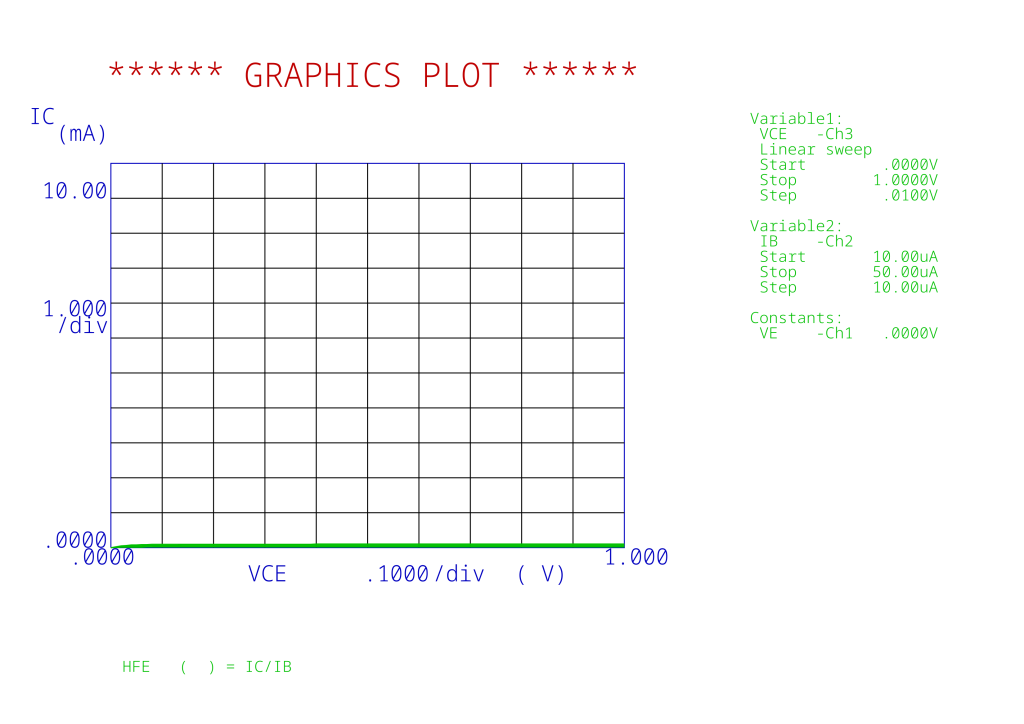
It’s weirdly flat. Let’s zoom in:
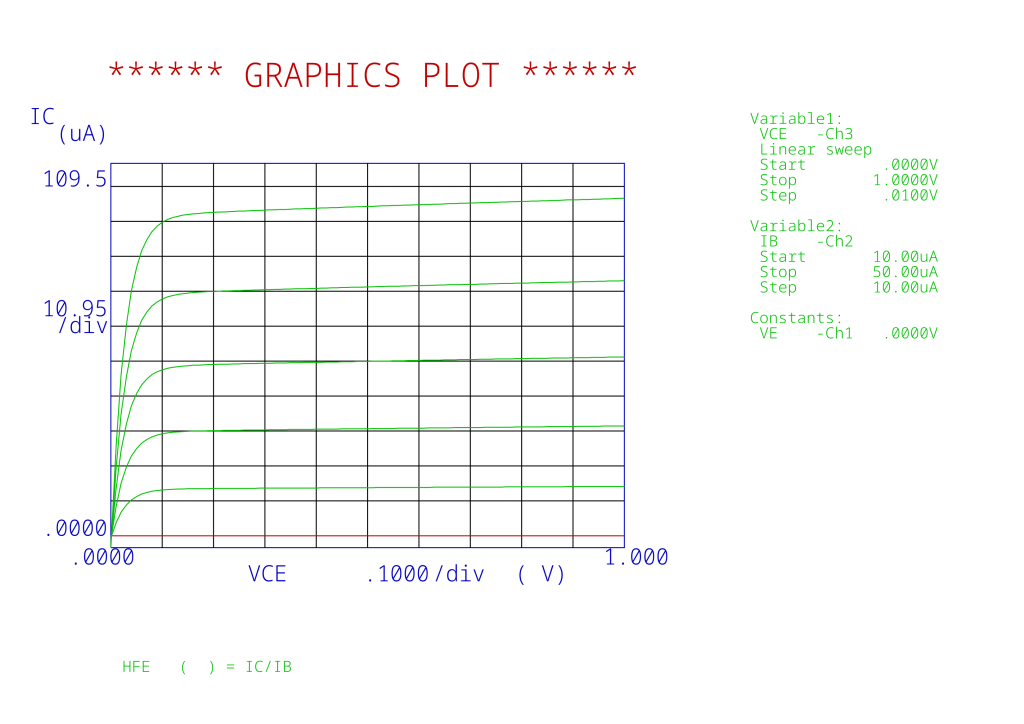
While now it does look more like what a transistor curve should look like, in reality it’s still wrong. At the left we can see Variable2 which starts at 10μA. This is the base current. At the highest trace, we see that it corresponds to a 50μA base current. With an hFE of 201 as measured by the component tester, we can calculate hFE to be 2. Definitely not good.
So let’s flip the transistor as the component tester indicates:
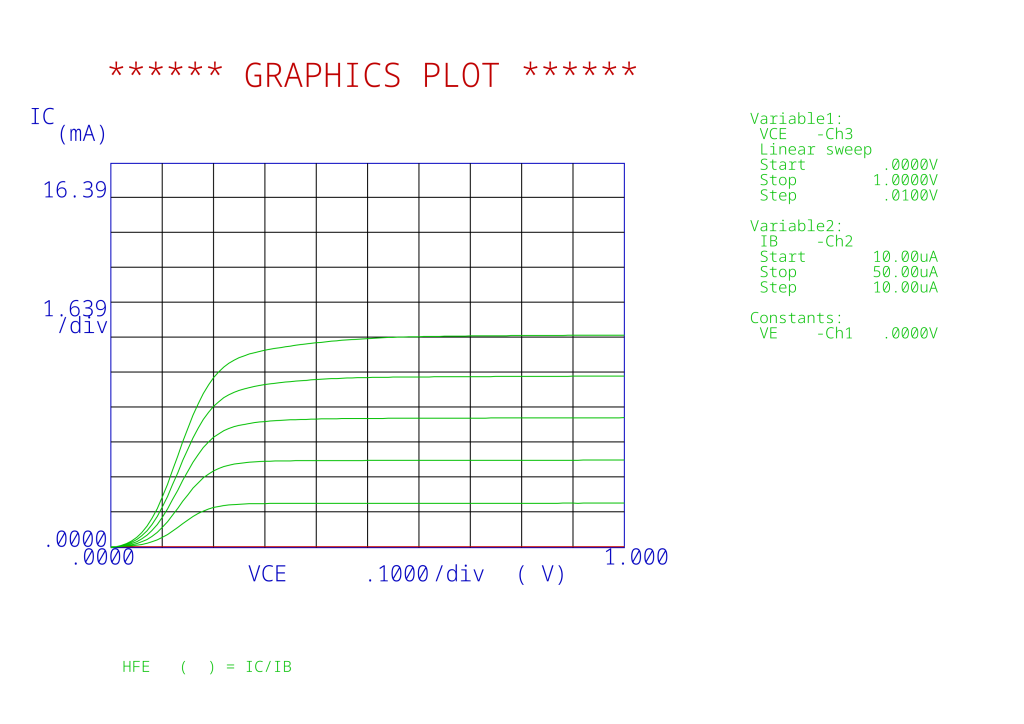
Now we’re getting somewhere. We’re seeing a collector current of 10mA for a base current of 50uA. For our measured hFE of 201:
$$ 50 \times 201 = 10050\text{ or } 10.05\,\text{mA} $$
So this is correct. We’ve confirmed that indeed, the transistor does indeed have its pins backwards, and the hFE is 201.
Let’s now compare it to the BC546C that we know came from a good source:
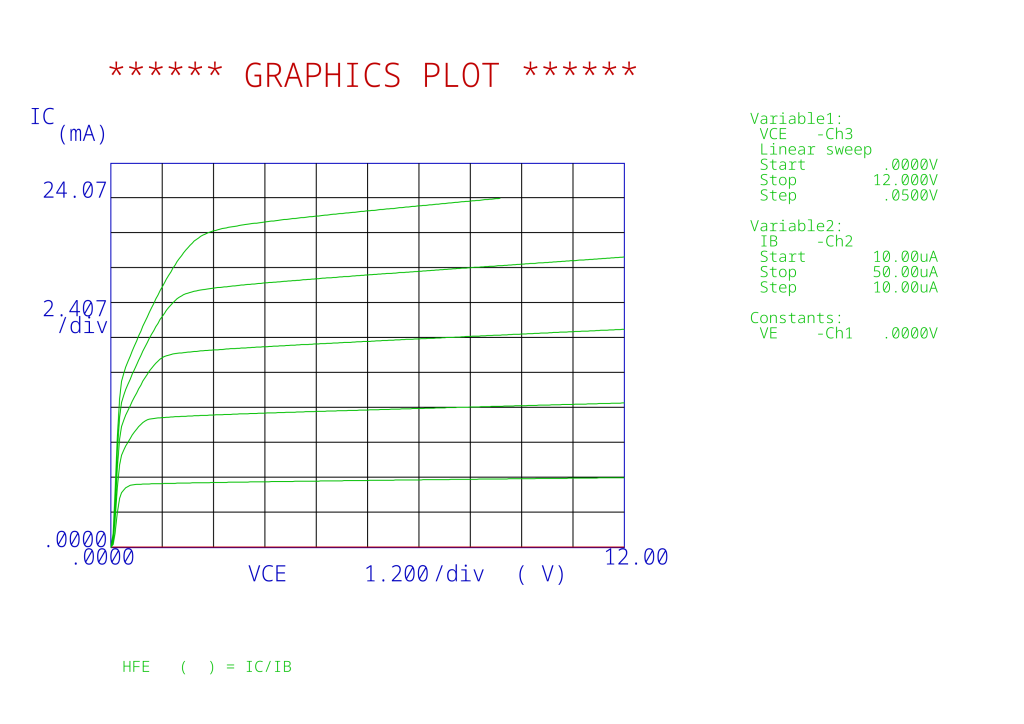
This time we’re sweeping also at 50mA but the span is now 0-12V. We can see the transistor is well behaved and works as expected. The hFE is even exceeding the 433 figure from before.
Let’s compare it to the curve we get from the 3904:
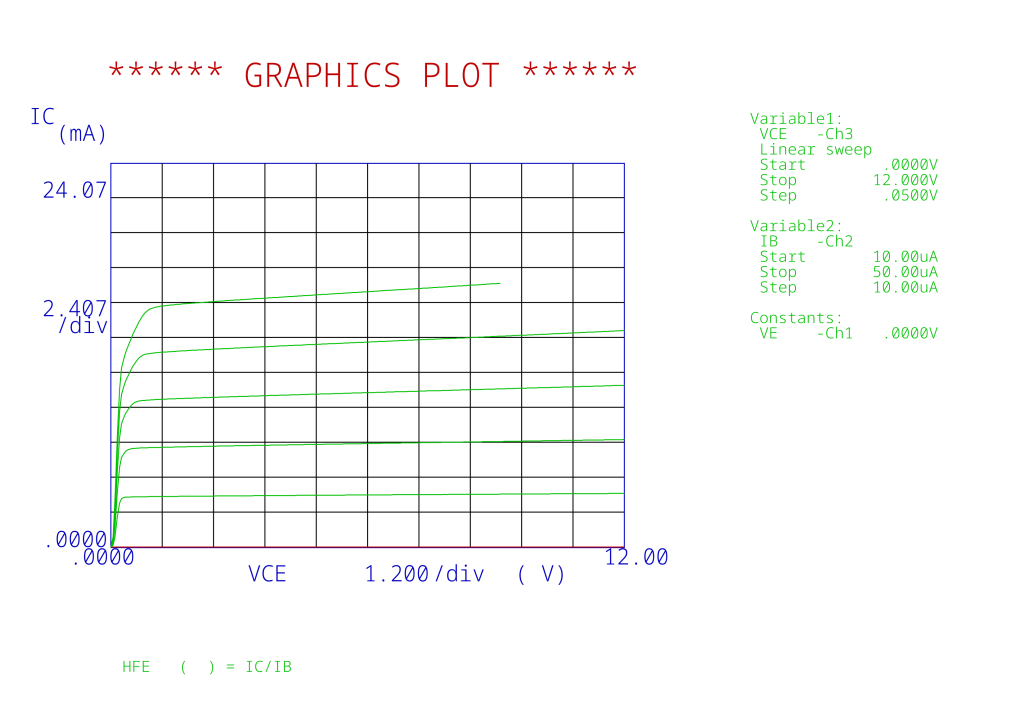
Looks similar, but with a smaller hFE
And the PN2222A:
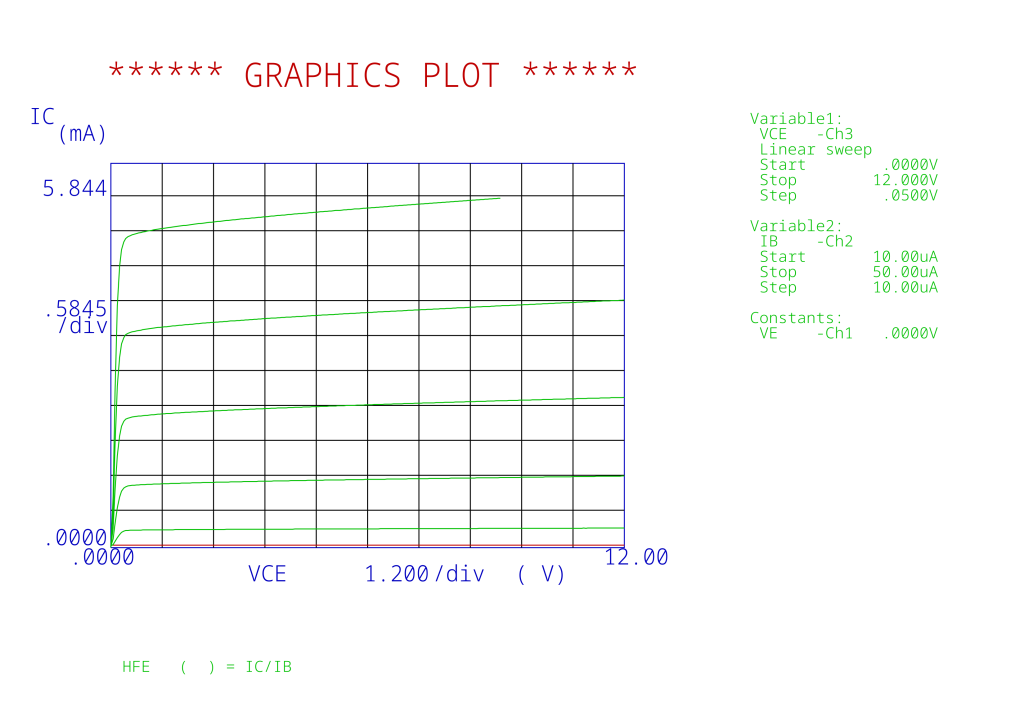
We can now see the PN2222A is behaving differently. At around 10V we see the last trace, the 50μA base current, actually gives us an Ic of 5.8mA, which would correspond to an hFE of 116, putting the PN2222A well within spec!
Explaining the discrepancy
The difference in hFE readings comes down to measurement conditions. The HP 4145B lets you define the collector-emitter voltage and base current precisely, and your 10 V sweep puts the transistor in a region close to normal operation. Cheap component testers, on the other hand, use very low voltages (often around 2–3 V) and tiny currents just to identify the part and estimate parameters. At those low voltages, transistors often show poor gain because they’re operating near saturation, where recombination dominates.
In short, transistors “become better transistors” at higher voltages. As Vce increases, the base-collector junction is more reverse-biased, reducing recombination and boosting the collector current relative to the base current. That’s why the HP 4145B showed a realistic hFE of about 115, while the quick tester reported only 24—it was simply testing under much softer conditions.
Going out of spec
Just for fun, here are the traces with the transistors under a 0 to 100V sweep. The highest rated of the bunch, the 546C, is only rated for 65V. The others are rated for 45V or less. Compliance is set to 20mA as it’s the maximum the 4145B allows me to set.
BC546C
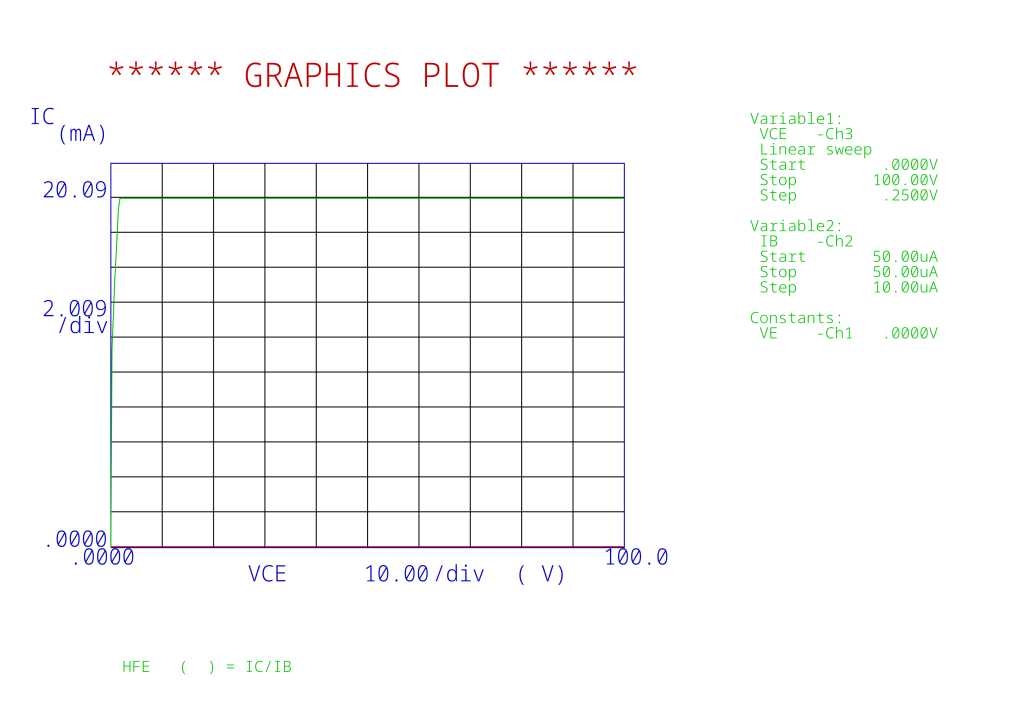
BC547C
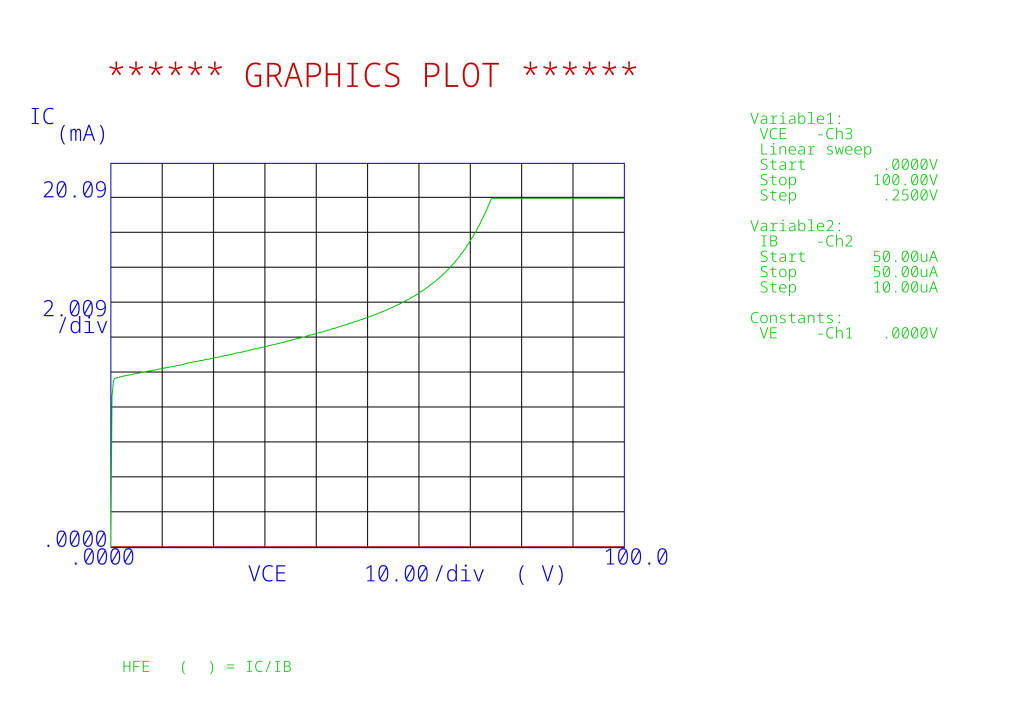
2N3904
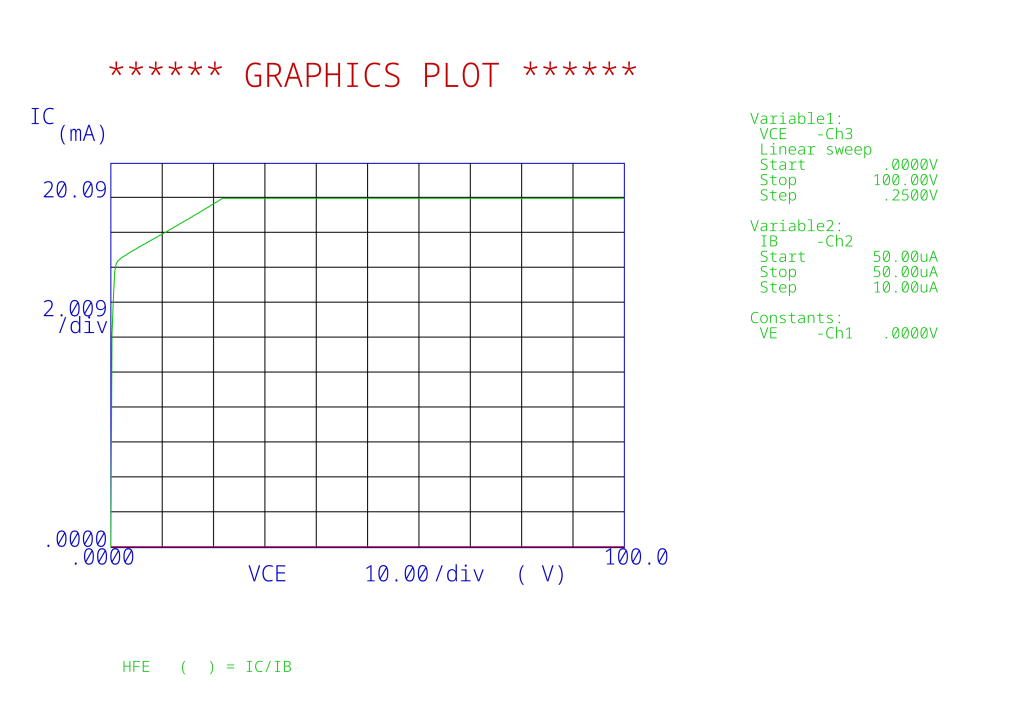
PN2222A
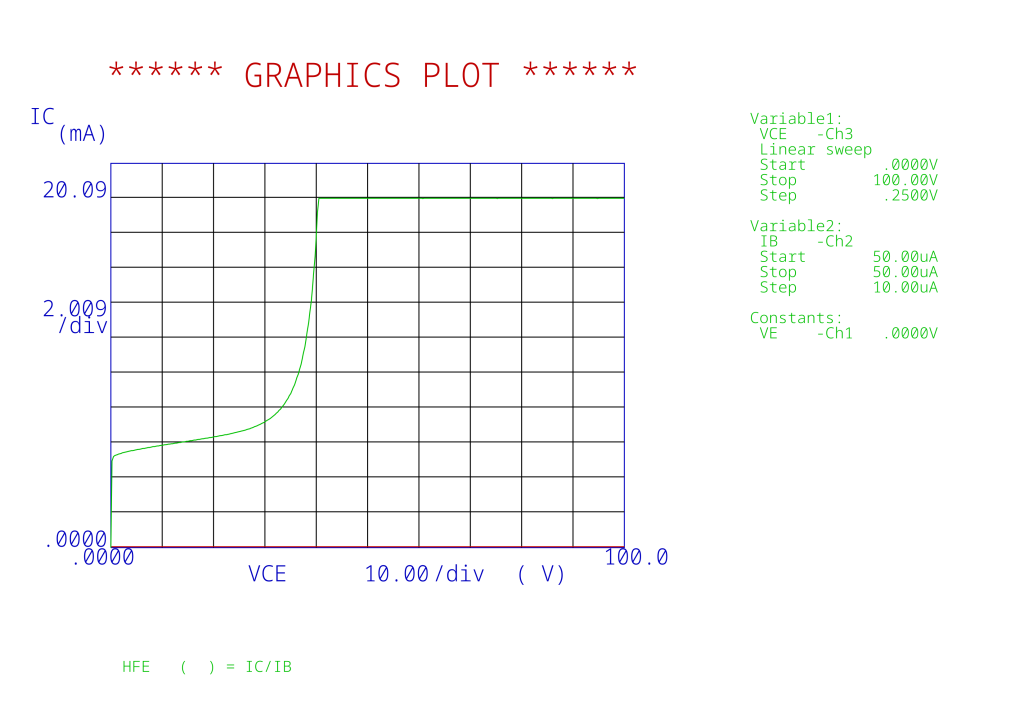
Conclusion
In the end, this little experiment shows why you can’t rely on quick component testers for more than basic identification. They’re great for sorting parts, but the numbers they produce don’t mean much—especially when comparing devices from unknown sources. The HP 4145B, on the other hand, gives a real view of how the transistor behaves under realistic voltages and currents.
A special mention goes to the fake BC547C, which turned out to have its pins reversed—a dead giveaway that it wasn’t what it claimed to be. Despite the labeling, it clearly wasn’t made to any known standard, and its electrical behavior confirmed it. The BC546C from a reputable source, by contrast, behaved exactly as expected. So if you’re chasing reliability—or even just accurate measurements—it’s worth buying components from trusted distributors. Cheap parts may work for a while, but as this test shows, what’s inside the package can be very different from what the label says.
The PN2222A and 2N3904, I’m not fully convinced they are genuine. They behaved correctly under certain circumstances, unlike the BC546C that behaved correctly in all circumstances. They may be OK for tinkering but you may also find yourself scratching your head chasing a problem that’s only being caused by a fake component.
I’ll have to get genuine ones to compare them to the presumed fakes.
But beyond the inconvenience for seasoned engineers or hobbyists, there’s something genuinely sad about this. Imagine a kid trying to build a simple circuit they found online — not some AI-generated nonsense or clickbait TikTok “hack,” but a real project meant to spark curiosity. They wire everything up perfectly, double-check their connections, and yet it just doesn’t work. And the reason isn’t their fault — it’s a fake transistor, a counterfeit component that never had a chance of functioning. For someone just starting out, that kind of experience can be crushing. A small failure like that can turn excitement into frustration, and maybe even make them give up on electronics entirely — all because a part as common as dirt couldn’t be trusted.
