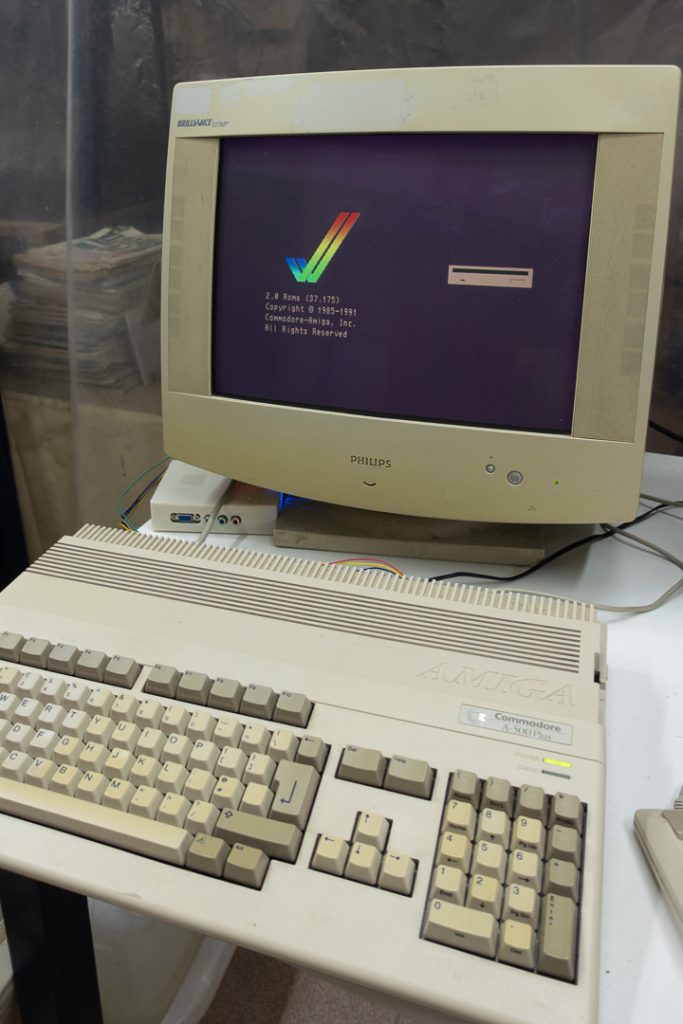
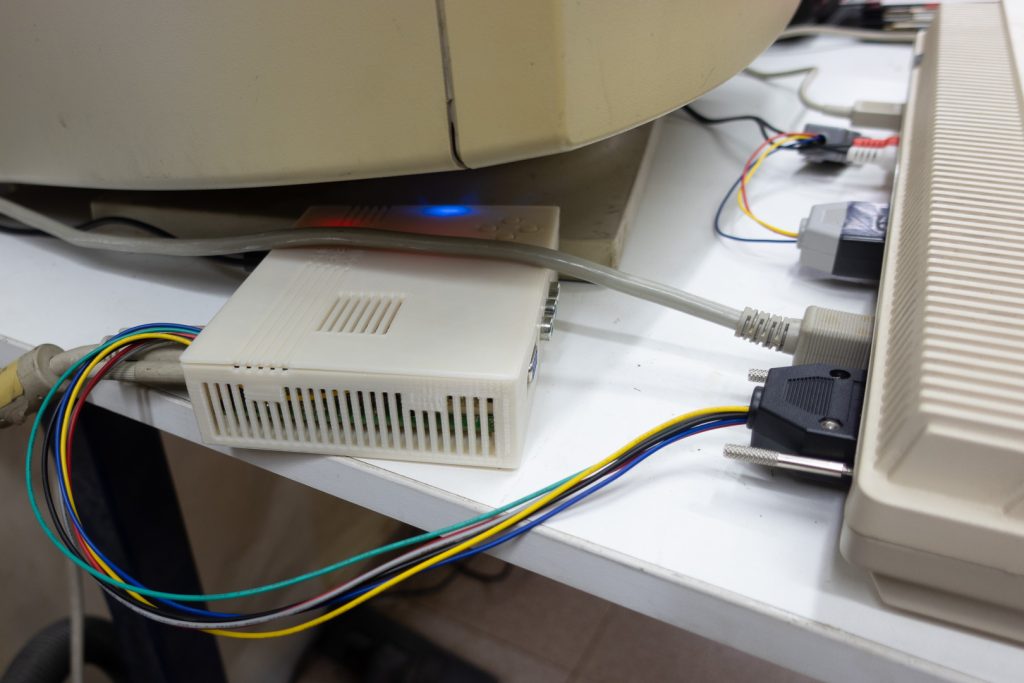
I use my GBS-8200 with a Commodore Amiga 500 since I don’t have the right monitor for it. I also use it with the Commodore 128, for the same reason. So far I’ve just left it on my desk, but this is unsightly and, well, dangerous…
So I decided to 3D print a case for it. There are quite a few designs on thingiverse but I liked this one, simple and no frills. I decided to use a beige-ish PLA so it’ll match the computer.
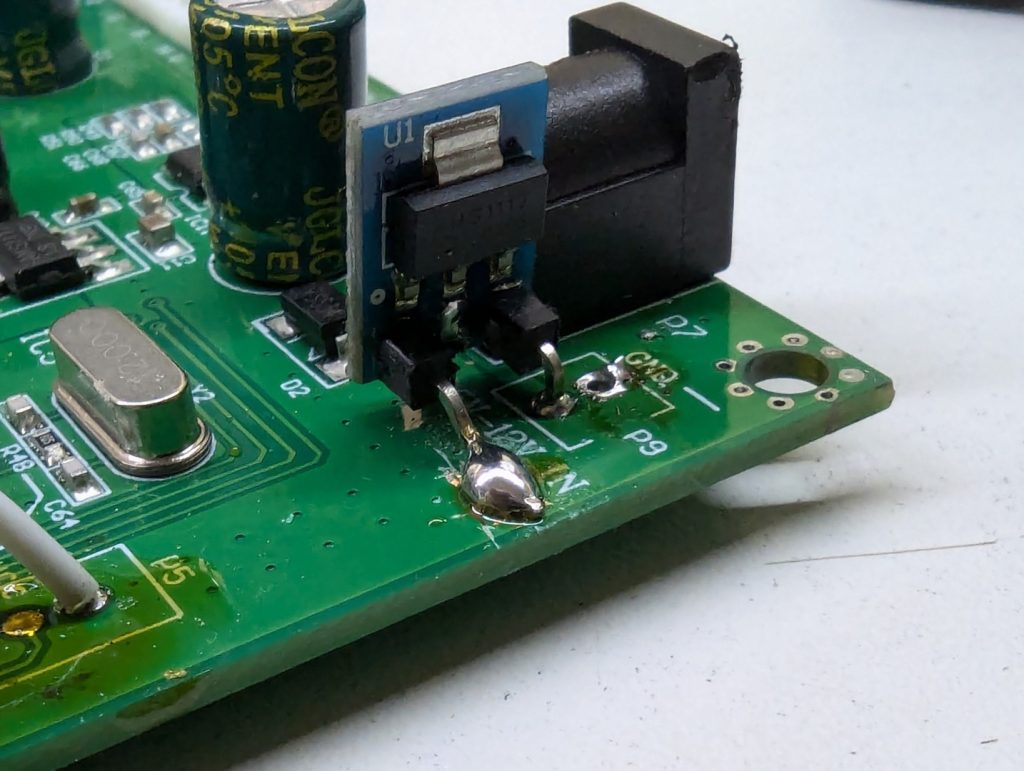
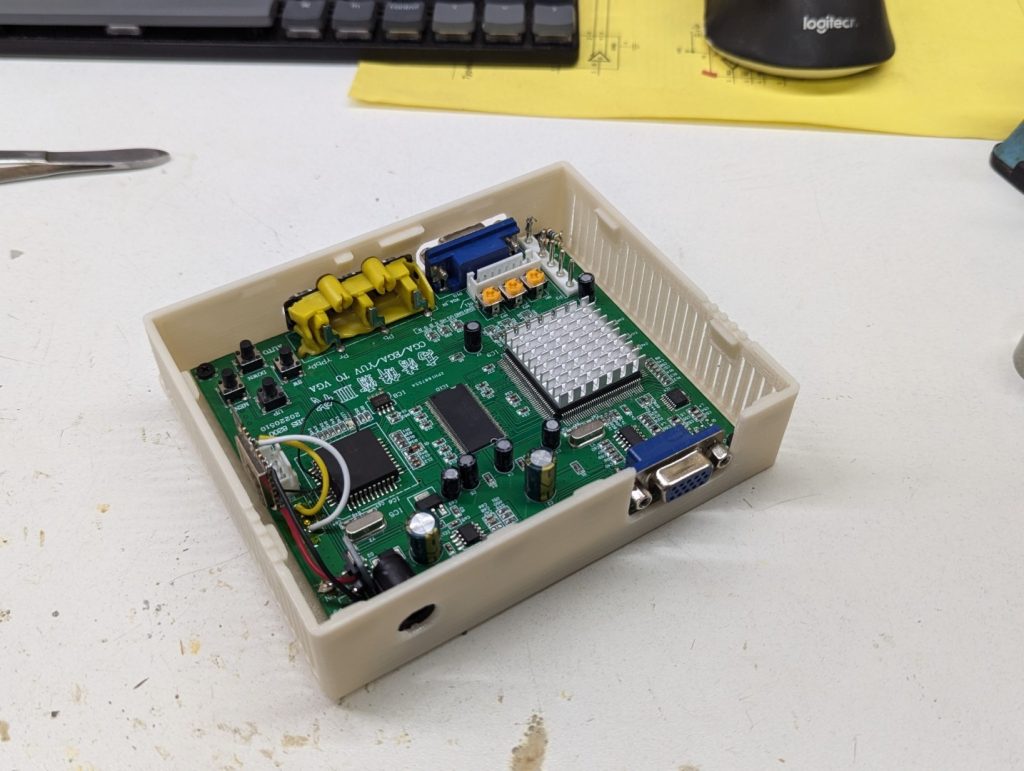
Preparing the board
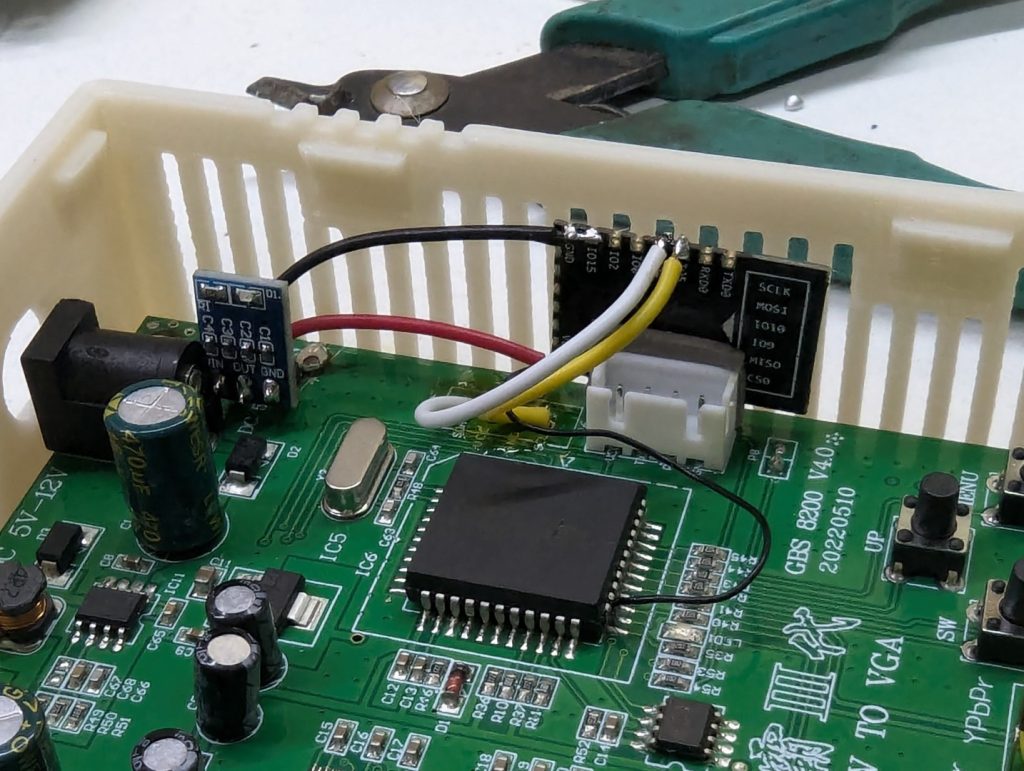
I have GBS Control installed in this thing, but I was using a NodeMCU board. it’s a bit big and too hacky-looking, so let’s use a bare ESP-12E module instead.
The first thing we miss when not using MCU is a 3.3V regulator. So let’s grab a cheap TC1117 based one, and do some leg bending. You’re also gonna have to remove the P9 socket, and scratch the PCB a little.
Then we need to mod the module with the minimal wiring to make it work. There are a few schematics out there, but this website has the absolute minimal: GPIO15 to GND, and CH_PD to VDD. That’s all you need.
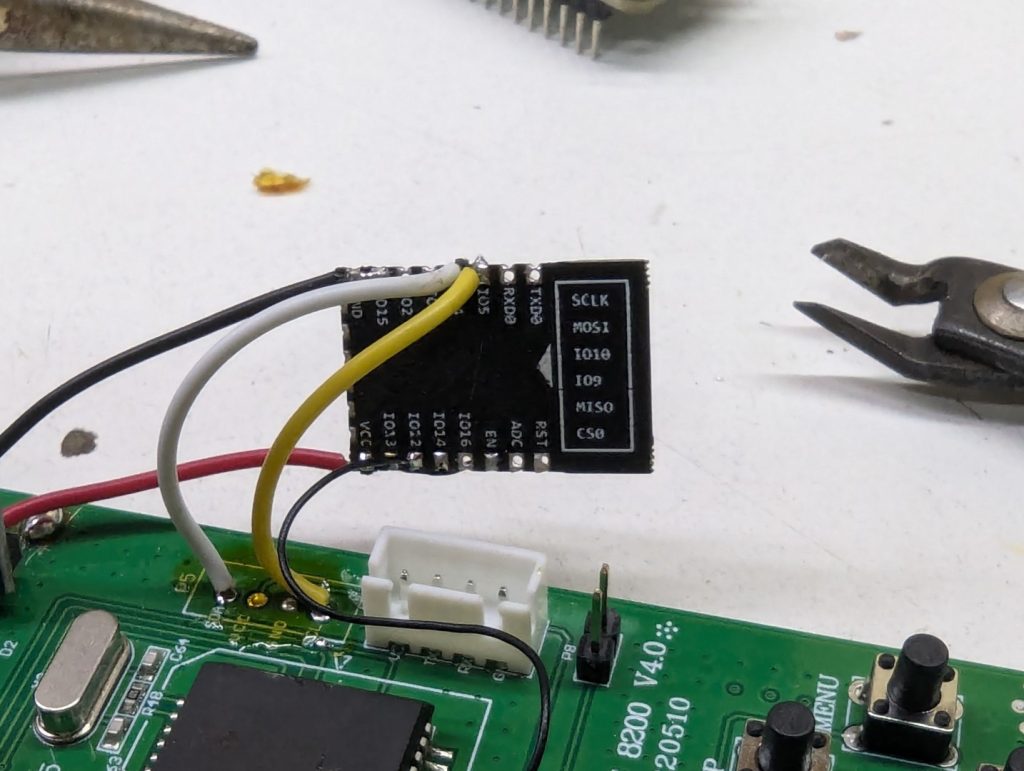
Wiring it up
Wiring it up is pretty straightforward, but you need to use the right pins. The D0, D1, D2… pins from NodeMCU aren’t mapped directly to GPIOs in the ESP8266. See the official docs to know where to find the Debug pin.
Here’s how you wire it up:
| GND | GND |
| VDD | 3.3V LDO Output |
| SDA | IO4 |
| SCL | IO5 |
| Debug | IO12 |
The case
Case was printed in beige PLA, with supports (though maybe innecessary. I usually go with PETG but PLA worked well enough.

The ESP8266 is held in place with strong double-sided tape (3M VHB)
All we have to do now is put the lid on, and fire it up.
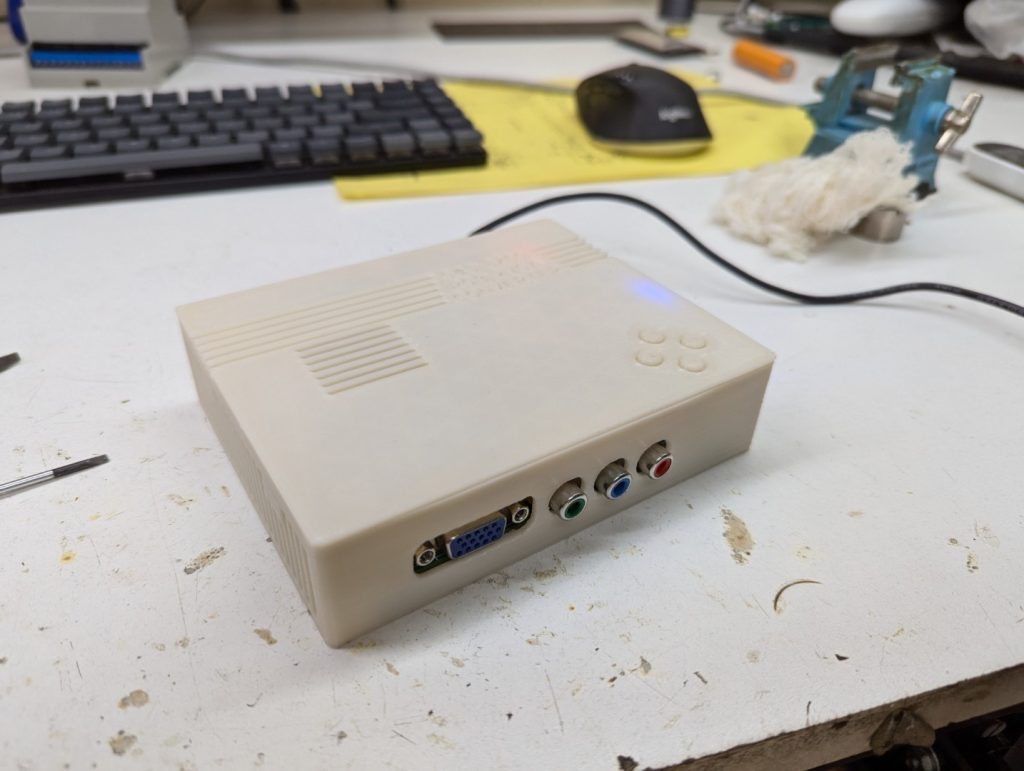
And that’s it. hope you enjoyed this print. Here are some photos of it in action